Group products by metafields
⭐️ This feature is available on Advanced plan or higher.
You can automate the process of creating and maintaining product groups using Shopify metafields. The app reads a text metafield from your products and groups them by shared values - products with the same metafield value end up in the same group.
For example, if your grouping metafield is custom.swatch_group and three products have the value "Backpacks", the app will create a group named "Backpacks" containing those three products. Products without the metafield are skipped.
The automation runs every 60 minutes, keeping your groups in sync with your metafield values. You can also trigger a sync manually at any time.
Automation setup
Step 1 - Set up the grouping metafield
Before creating the automation, you need a metafield on your products that will determine how they are grouped.
In your Shopify Admin, go to Settings → Metafields and metaobjects → Products and create a new metafield definition:
- Name: Swatch Group (or any name you prefer)
- Type: Single line text


Then go to each product and fill in the metafield value. Products that should appear in the same group must have the exact same value.
For example:
| Product | Metafield value | Resulting group |
|---|---|---|
| Red Backpack | Backpacks | Backpacks |
| Black Backpack | Backpacks | Backpacks |
| White Sneakers | Sneakers | Sneakers |
| Winter Jacket | (empty) | (skipped) |

Tip: The metafield value becomes the group name exactly as written. Make sure the values are consistent across products (e.g. "Backpacks" vs "backpacks" would create two separate groups).
Step 2 - Create an automation
Go to Product groups → Automations and click Create automation.


Fill in the form:
- Automatically group products using - select Metafields.
- Metafield for grouping - select the metafield definition you created in Step 1. If you don't see it, click the reload button next to the dropdown.
Next, configure Group attributes. These settings are applied to every group the automation creates:
- Option name - the label shown in the swatches widget on your storefront (e.g. "Color", "Style", "Design"). This tells customers what the swatches represent.
- Group position - the order of the group in the widget when a product belongs to multiple groups. Set to
1for the first position. - Group displayed on - where the swatches widget appears: on product pages only, collection pages only, or both.
Finally, configure Swatch attributes:
- Swatch type - how swatches are displayed:
- Auto - attempts to match an existing swatch by name. If no match is found, the product image is displayed.
- Product image - always uses the product's featured image as the swatch.
- Image with text - displays a text label from a metafield. Requires a Metafield for swatch name (see Metafield for swatch name below).
- Pill - displays a text label as a pill/button. Also requires a Metafield for swatch name.
Click Create to save the automation. It will be created in an Inactive state.

Step 3 - Activate the automation
Open your automation and click Activate. The automation will immediately begin processing your products.
You can check the progress in the Overview sidebar on the automation page, which shows:
- Last run - when the automation last synced
- Groups - how many groups are being managed

Step 4 - Verify your groups
Once processing completes, go to Product groups to see the groups created by the automation. Each one will be marked with an Automated badge.
Important: Products and groups managed by an automation cannot be edited manually. Any manual changes will be overwritten on the next automation run. To change which products appear in a group, update the metafield values on your products in Shopify.

Ongoing sync
The automation runs automatically every 60 minutes. On each run it:
- Creates groups for any new metafield values found across your products
- Adds products that were given a matching metafield value
- Removes products whose metafield value was changed or cleared
- Deletes groups that no longer have any products (e.g. if all products in a group had their metafield value removed)
If you don't want to wait, click Run now from the automation page to trigger an immediate sync.
Pausing or deleting an automation
- Deactivate - pauses the automation. Existing groups are kept but no longer updated. You can reactivate at any time.
- Delete - permanently removes the automation and all groups it created. This cannot be undone.
Note: The automation type (Collections vs. Metafields) cannot be changed after creation. If you need to switch, delete the automation and create a new one.
Metafield for swatch name (optional)
You can use a Shopify metafield to provide custom swatch names for your products. This is optional for Auto and Product image swatch types, but required for Image with text and Pill types.
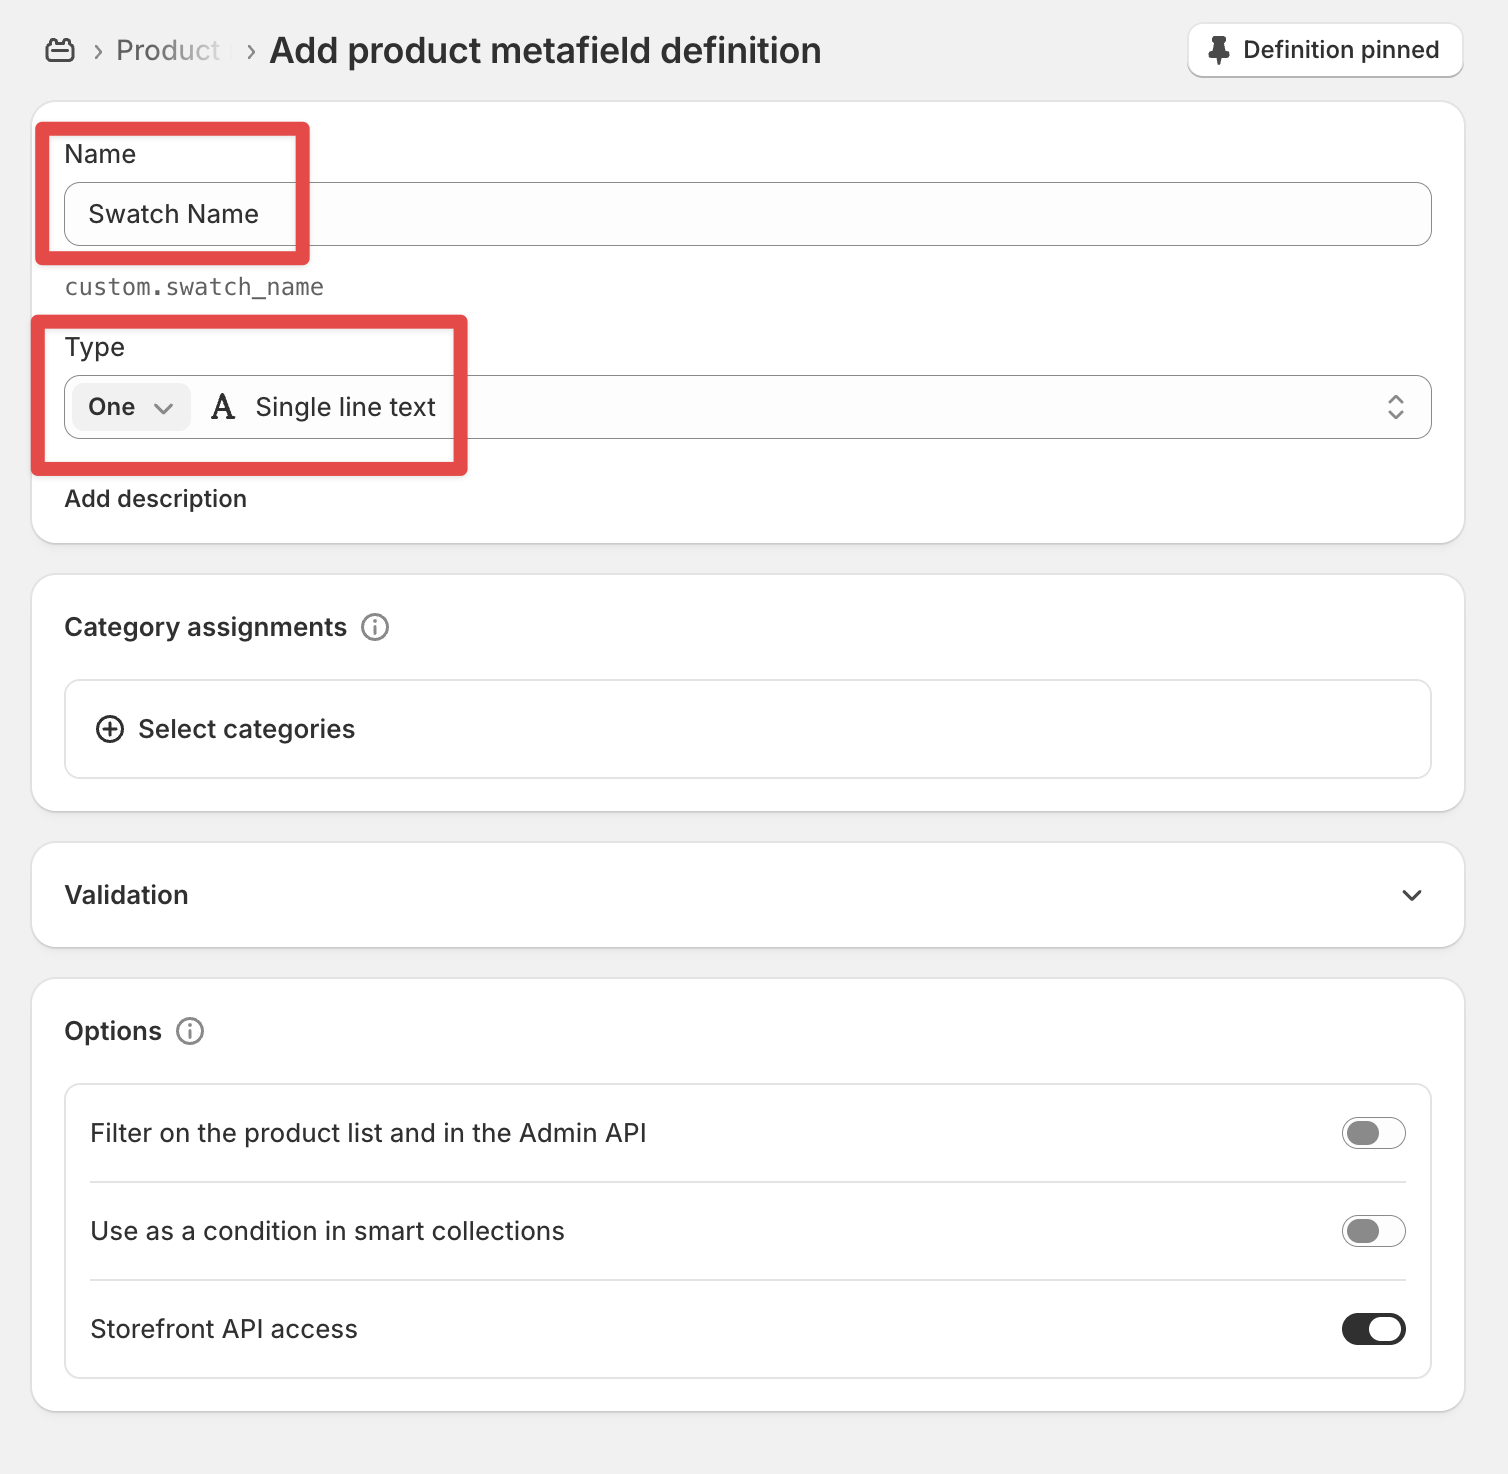
Step 1 - Create a metafield definition
In your Shopify Admin, go to Settings → Metafields and metaobjects → Products and create a new metafield definition:
- Name: Swatch Name (or any name you prefer)
- Type: Single line text
Step 2 - Fill in metafield values
On each product page in Shopify Admin, enter the swatch name in the metafield you just created (e.g. "Red", "Ocean Blue", "Charcoal").

Step 3 - Connect the metafield to the automation
In the automation form, under Swatch attributes, select your metafield definition in the Metafield for swatch name dropdown. If you don't see it, click the reload button next to the dropdown.

Step 4 - Run the automation
Click Run now or wait for the next automatic run. The app will use the metafield values as swatch names and attempt to match them with existing swatches in your library.
To verify this you can open group linked to automation. It should have filled Swatch name field now.

Also, if you already used swatches with the same name in the app - automation will find them by swatch name automatically and assign correct swatch type and color/image.
Metafield for swatch position (optional)
By default, swatches in a group are ordered by how products appear in the Shopify API. If you want to control the order yourself, you can use a metafield to set a custom position for each swatch.
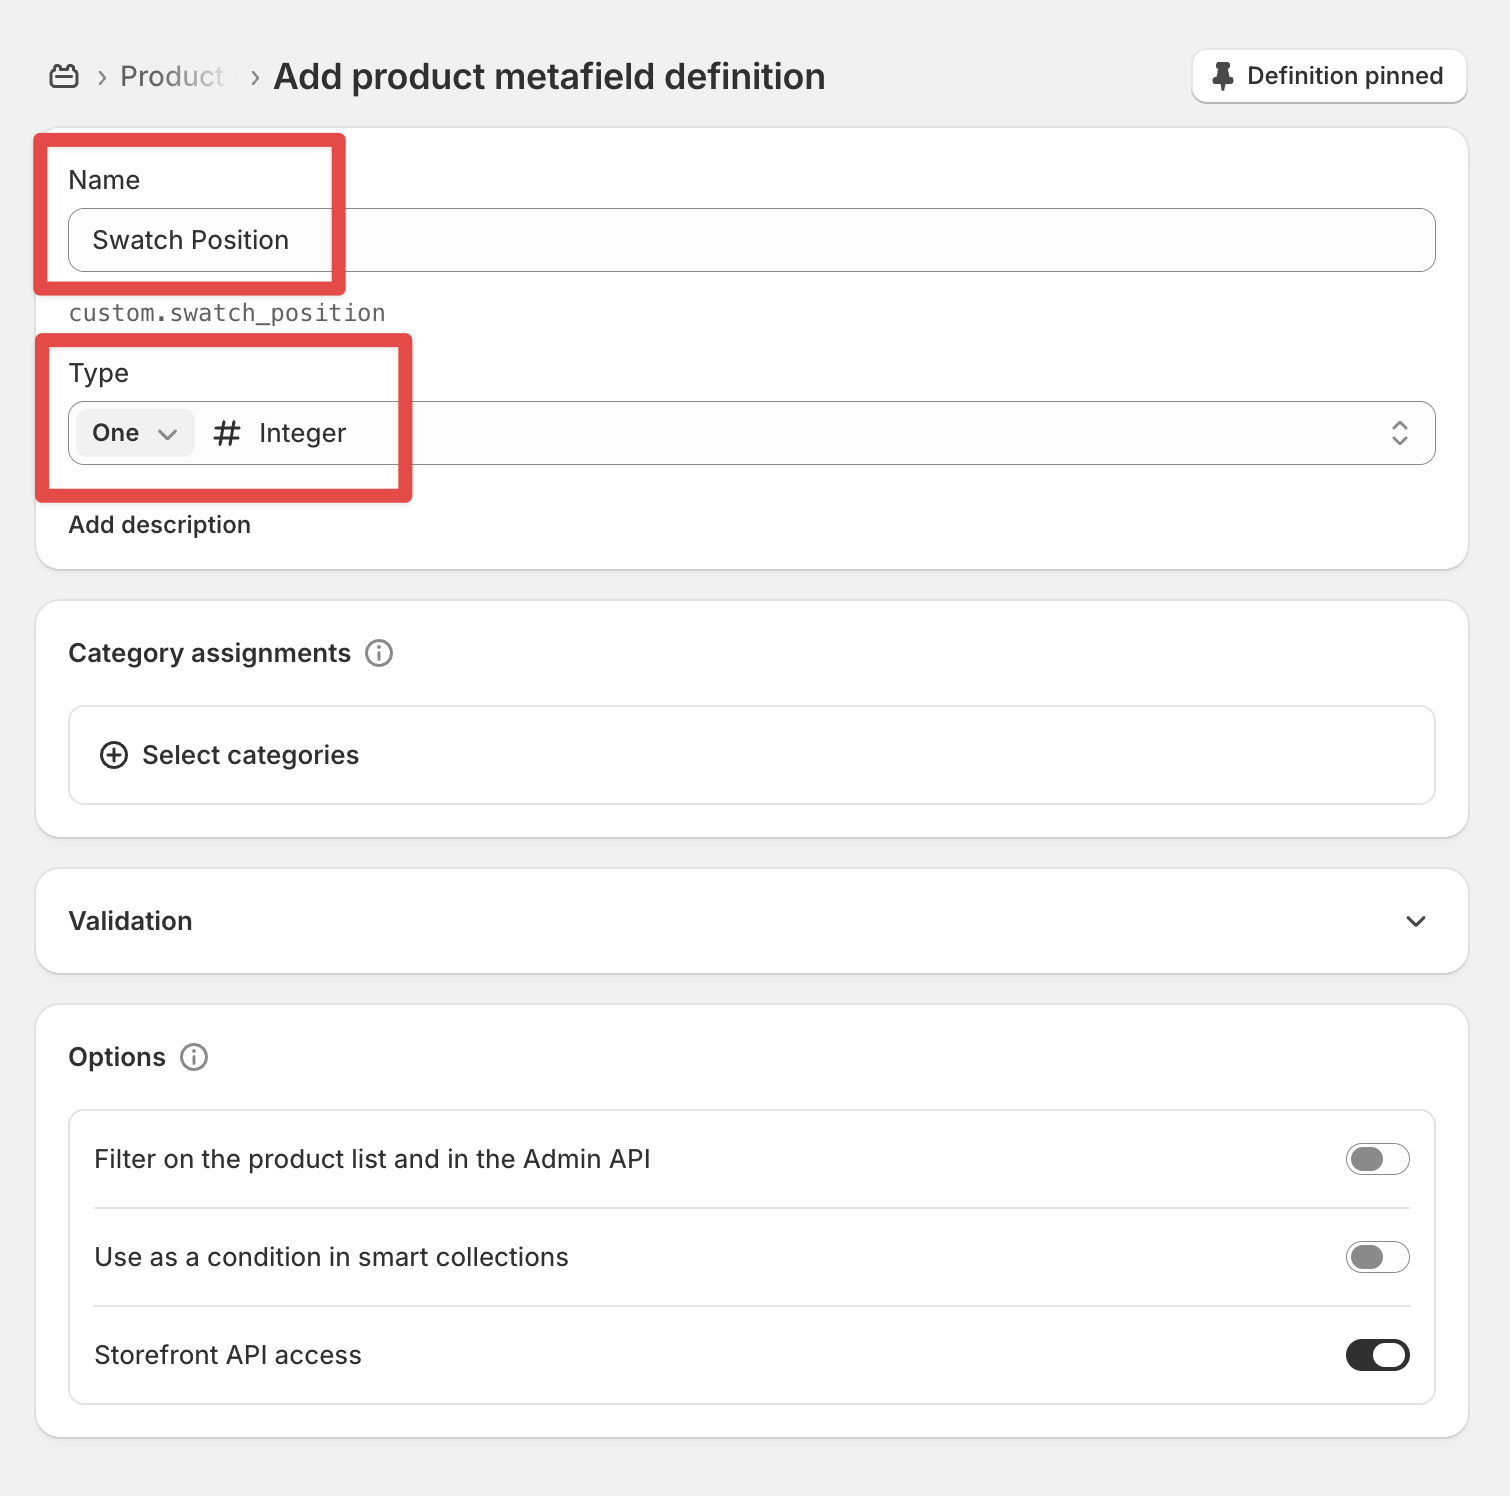
Step 1 - Create a metafield definition
In your Shopify Admin, go to Settings → Metafields and metaobjects → Products and create a new metafield definition:
- Name: Swatch Position (or any name you prefer)
- Type: Integer
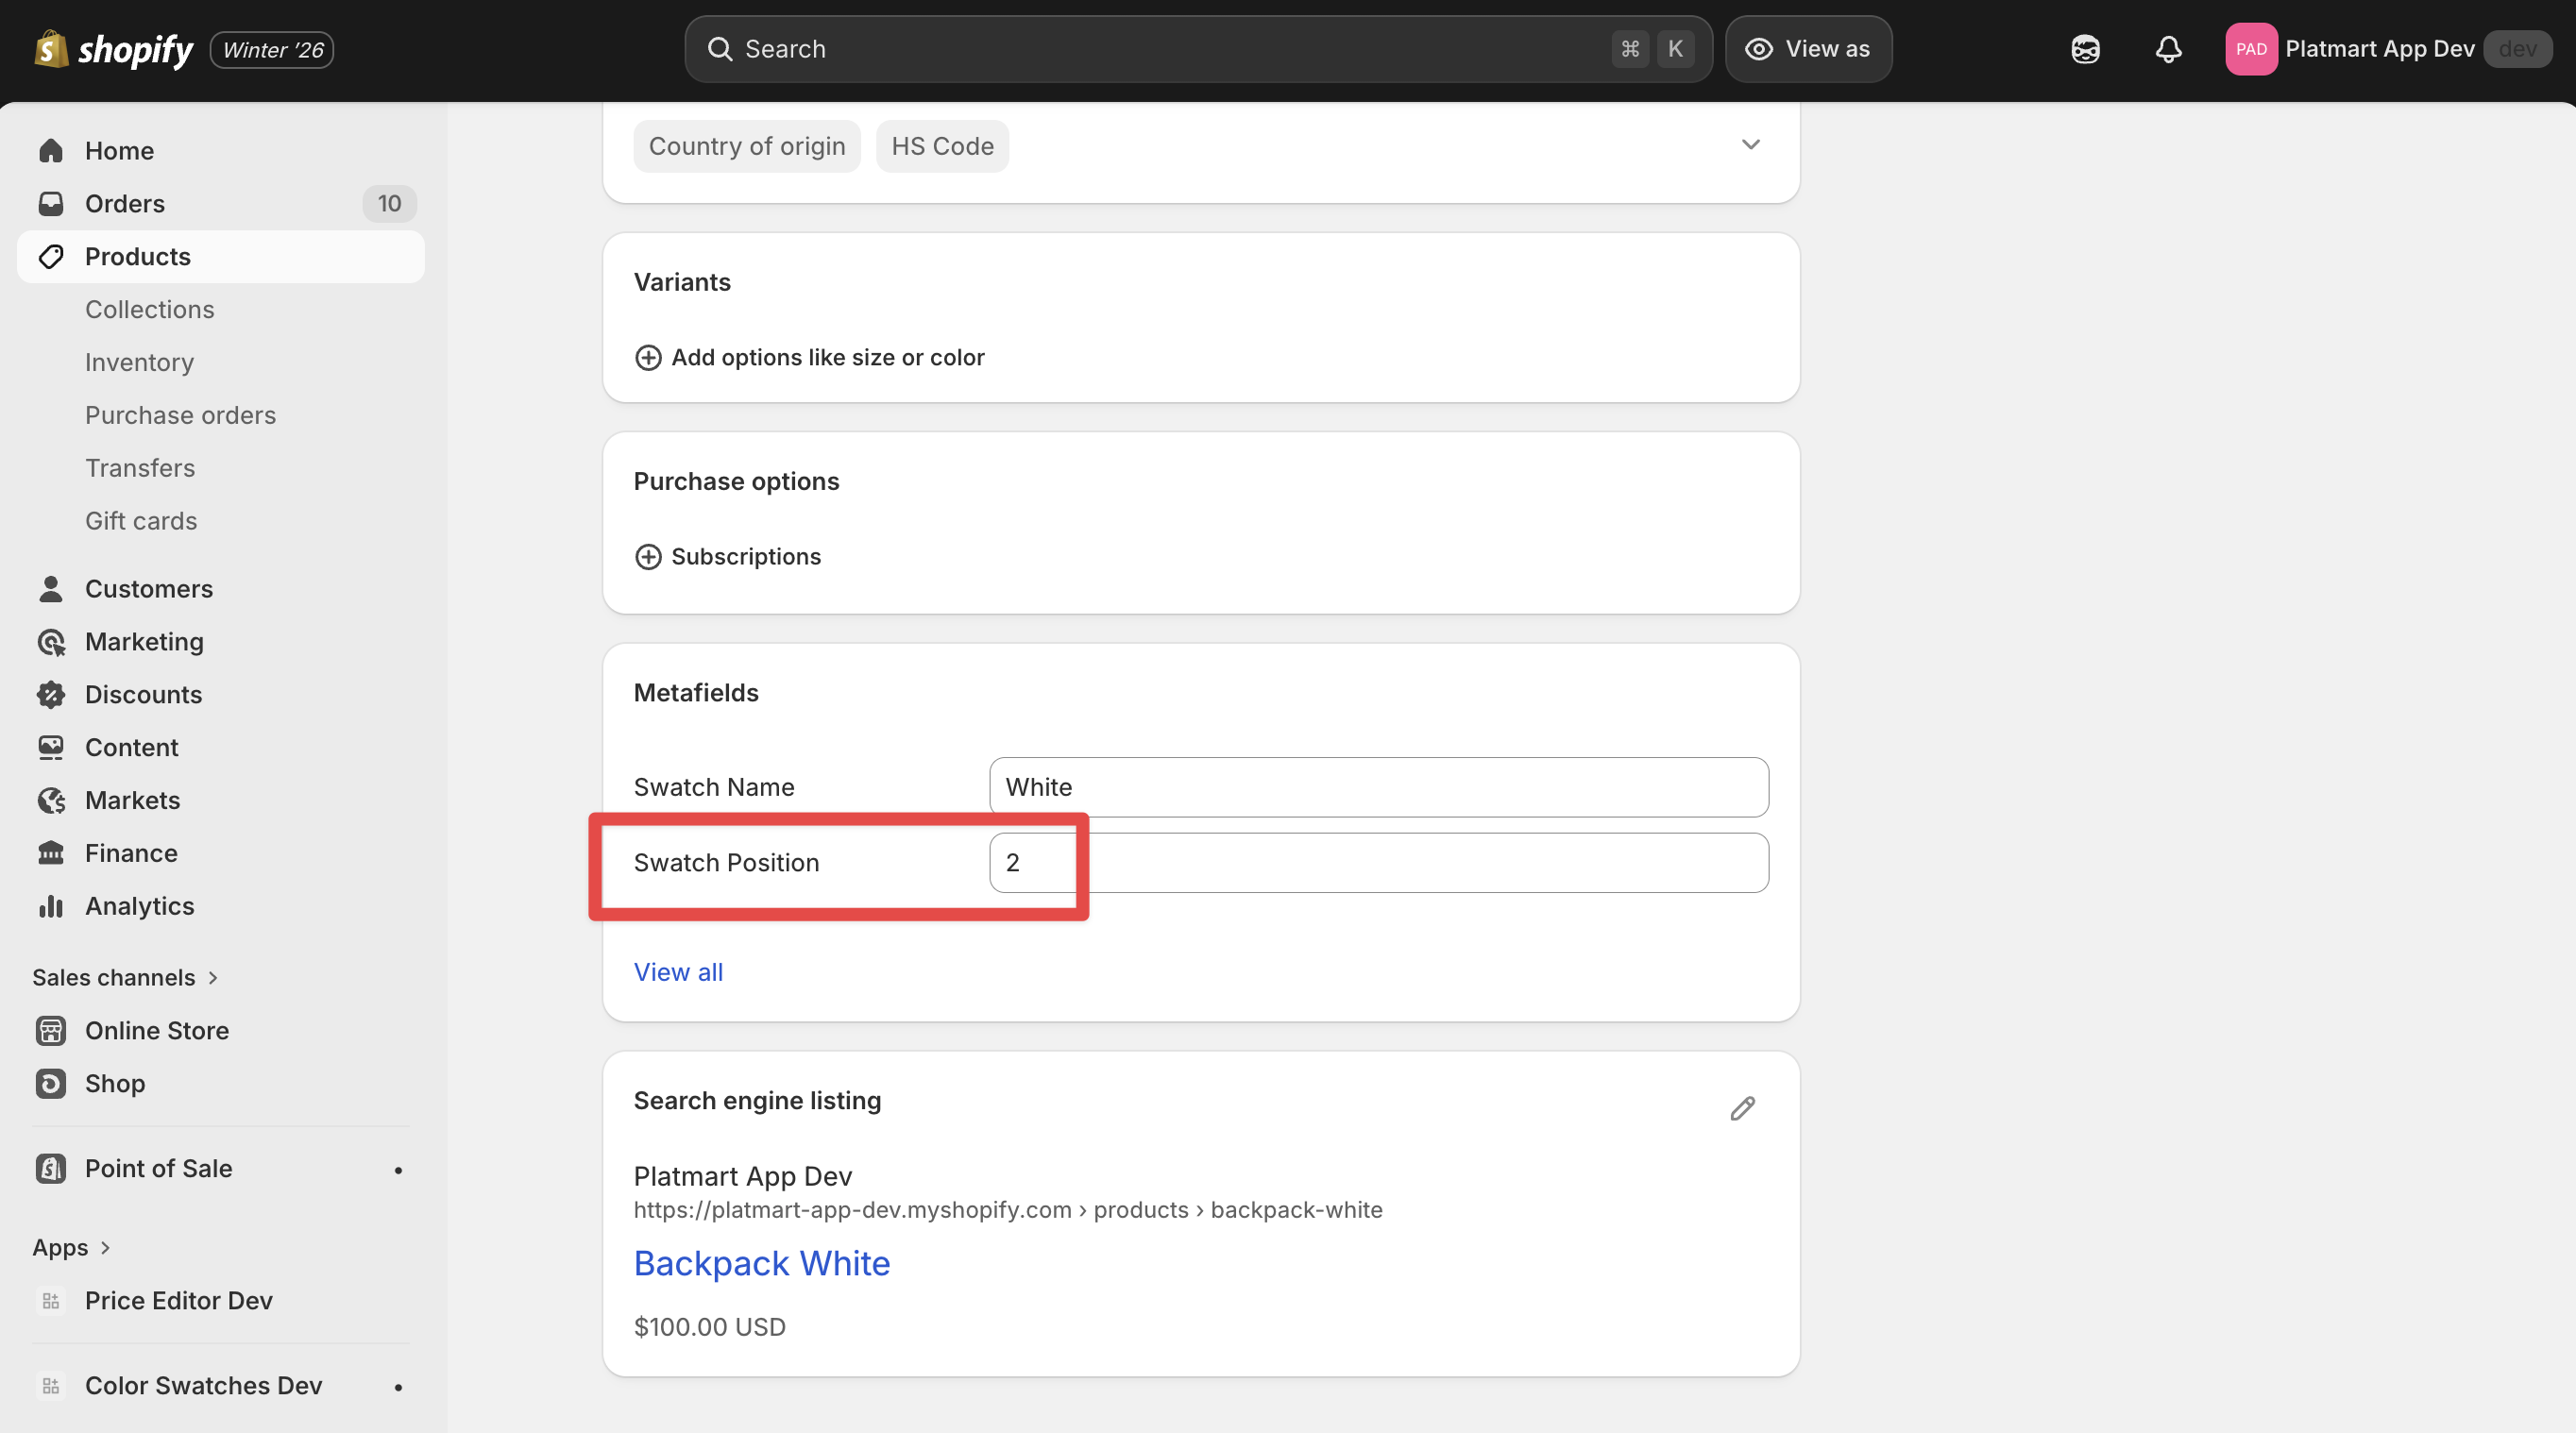
Step 2 - Set position values on products
On each product page in Shopify Admin, enter a number in the metafield. Lower numbers appear first.
Step 3 - Connect the metafield to the automation
In the automation form, under Swatch attributes, select your metafield definition in the Metafield for swatch position dropdown. If you don't see it, click the reload button next to the dropdown.

Step 4 - Run the automation
Click Run now or wait for the next automatic run. Swatches will be reordered according to your metafield values.